5 electrical tips for a bathroom renovation
If you’re planning a bathroom renovation, it is important to consider both the electrical layout and lighting. Choosing the right lighting has aesthetic benefits such as making the room appear larger, as well as highlighting the features and style of the bathroom.
Because of the increased moisture in bathrooms, there are electrical safety zones for you to consider in your layout as well as your selection of lights and appliances. We’ve compiled several design and electrical tips to consider with the help of licenced electrician, George Elias from Bolt Electrics in Castle Hill, NSW and licenced builder and bathroom specialist, Mohammed Malas from DCON Group, Sydney.
ADVERTISEMENT
- Know your electrical safety zones
In Australia, all electrical work must comply with AS/NSZ 3000, which includes specific requirements for moisture-prone areas. To minimise the risks of electrical hazards in your bathroom, there are electrical safety zones. A bathroom can be divided into four electrical zones which assist with safe electrical placement.
- Zone 0: Interior of bath or shower space and inside the vanity basin. These are best known as the areas that collect water. Only low voltage lighting is allowed and an IPX7 rating is required for lighting in these areas. Ingress Protection (IP rating) refers to the level of protection against the intrusion of dust, water or accidental touch from the electrical enclosure.
- Zone 1: Above the shower, bath or basin up to a height of 2.5M (IPX4 lighting)
- Zone 2: 600mm radius outside of Zone 1 (options include: IPX4, double insulated, low voltage or lights recessed into the ceiling).
- Zone 3: Outside of Zone 2, considered the least restrictive of all zones (no IP ratings).
“Typically, 12V IPX7 lighting is the only option for areas in, and immediately surrounding a water source,” says George. An example of this is an LED strip light in the shower niche. “The transformer from 240V to 12V will also need to be located in zones 2 & 3, to ensure that it, and any 240V wiring, is protected from water exposure.”
If you’re considering where to place light switches and power points, you’ll also need to pay attention to electrical safety zones. Both light switches and power points must be located in zones 2 & 3, in addition, residual current devices (RCDs) must be used for all electrical sources in the bathroom to reduce the risk of electric shock. Minimum distances and IP ratings for power points and switches still apply depending on whether they are in zones 2 or 3.
- Use wall mounted lights around the vanity for better illumination
When it comes to lighting the mirror above your vanity, George recommends wall mounted lights (also known as task lights) such wall sconces or a light positioned above the mirror. These can be in addition to ceiling lights, but they provide superior illumination for things like shaving or makeup application.
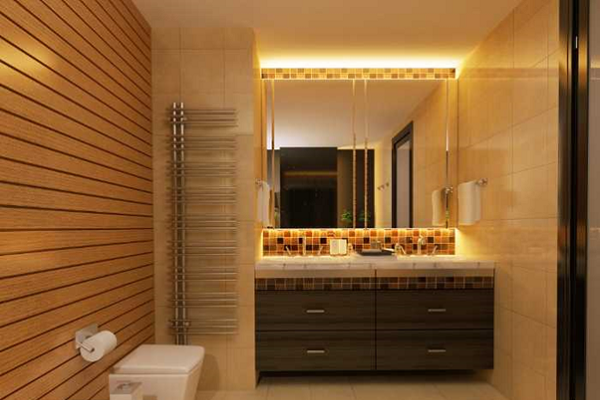
Whilst wall mounted lights are extremely functional, don’t forget vanity lights, or back-lit mirrors. According to DCON Group, “vanity-mounted lights are extremely popular with higher-end bathrooms right now, as they can provide soft, accented lighting of the sink and vanity, as well as minimising harsh, bright light in the middle of the night.”
- Match power point styles with the rest of the bathroom
It may be something we don’t think too much about, but matching the power points in the bathroom with other features such as tiles or fixtures can really add to the premium look and feel. If you have a simple white design then regular white power points can be fine. However, if your bathroom features other colours, it’s worth considering alternatives.
According to Mohammed, “If we’re renovating a bathroom with black tapware, faucets and showerheads, we’ll often use stylish black Clipsal Saturn outlets and switches to match.”
Another consideration is installing a power point inside your vanity as this can give your bathroom design a clean, attractive look as you can charge electric shavers or electric toothbrushes neatly inside the vanity.
- Consider alternatives to heat, light and fan combination devices
Shocking as it sounds, there are better alternatives out there to the popular heat, light and fan combination device. George usually advises his customers to consider individual systems for each function.
For example, the IXL Tastic heat module does a better job at heating the bathroom than the typical heat lamps in a combo device. Heat modules are also slimline and suit bathroom styles more easily than obtrusive heater bulbs.
LED downlights are also a better, stand-alone alternative, especially anti-glare, flush LED downlights that reduce glare while you are under the lights for better aesthetics and light quality.
Installing an inline fan ventilates the bathroom more effectively by extracting the heat and moisture from inside and redirecting it outside. This prevents fogging up the bathroom after a shower and potential mould issues. There are also more options for the grill that you can choose, which makes it easier for you to match colours with other accessories in your bathroom as well as choosing the size.
- Consider underfloor heating and heated towel rails
If your budget can afford it, consider underfloor heating and towel rails. This can heat up your entire bathroom, add value to your home and create the ultimate relaxation during the colder months.
Unlike your toilet or taps, underfloor heating is much harder to install post-renovation, and whilst hard-wired towel rails can be installed later, it’s much easier and cheaper to do them before the plastering and tiling are complete.
-
ADVERTISEMENT
-
ADVERTISEMENT


